So you’ve got a curling iron but don’t know the first thing about how to use one? Or maybe you do, but are tired of the same look, day in and day out. Don’t worry, you’re in the right place.
You can achieve different looks, all with the same curler, simply by using different techniques. While your barrel diameter will determine how tight or loose your curls are, the following methods still work regardless of whether you have a ¾”, 1″ or 1 ¼” barrel.
Before we get into it, it’s important to note that results will vary depending on your hair type, length, texture, and curling iron…so experiment with the following techniques to see what works well on you.
Prep
Always start with clean, completely dry hair, whether air-dried or blow-dried. Also be sure to evenly apply heat protectant to your strands before you do any heat styling.
Practice
If you’ve never curled your hair before, try these methods out with a cool iron to get your hand eye coordination down before plugging your curler in. It’ll save your hair from extra damage (and your skin from burns) while you get the hang of it.
Flat Wrap Technique
The flat wrap is probably the most common technique. It creates a pretty, romantic ribbon curl:
The key to this curl is keeping your hair flat as you wrap it around the barrel. It’s generally easier to do with a curling iron instead of a wand because the clamp helps keep your hair flat against the rod as you turn and twist the iron.
Hold the curling iron vertically so the tip faces up. Clamp a 1” section of hair either near your head or midway down (depending on how far up you want your curls or waves), and curl down towards your ends. The further up you start, the more volume you’ll get near your scalp.
Note: Some gals clamp the ends first and curl upwards. This isn’t ideal because the end is the most fragile part of the strand. It’s better to start at the top or middle where your hair is strongest and make your way down.
As you turn the iron 360°, slightly open the clamp so that more hair can slide through and around. As you go, wait a few seconds between each turn before adding more length onto the barrel. The longer you hold your hair in, the more defined and uniform the curl will be.
If your hair is extra silky or doesn’t like to hold a curl, spray some flexible hold hairspray on each section and comb through to evenly coat your locks before curling.
You can either leave an inch or two at the bottom out, or continue through to the tips if you want curled ends.
You can also do a flat wrap with a curling wand, which requires you to hold the section of hair as you wrap it around the barrel. The best way to keep your hair flat is to alternate it between your index/middle fingers and middle/ring fingers as you wrap.
Don’t get discouraged if you don’t get this at first – it does take a bit of practice to get the coordination down, especially if you’re working on your non-dominant hand side. I find it easier to use a clamp iron if you’re trying to get uniform ribbon curls.
Here’s how to do the flat wrap with a wand (#1), as well as the the twist wrap technique (#2) that we’ll get to next:
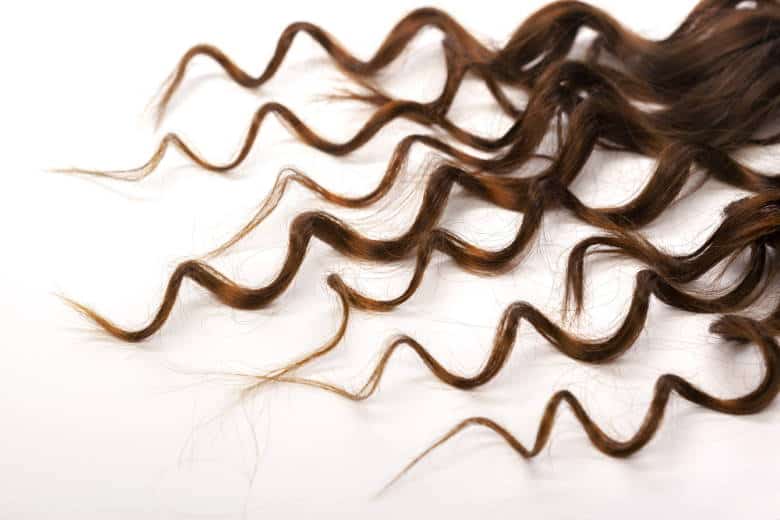
Twist Wrap Technique
With this technique, twist a 1” section of hair before wrapping it around the barrel. Start twisting from your scalp down the length of the strands, hold onto the ends, and then wrap the piece around the rod like a rope.
Depending on your hair type and how tight a curl you want, hold it in place for anywhere between 5-12 seconds before releasing. Let the curl fall into the palm of your free hand to let the hair set and cool.
Again, you can do this with either a spring clamp iron or a wand. The wand is slightly easier to use, but a clamp can also be useful to help hold your hair against the barrel once you’ve wound it around the rod.
With this method, you’ll get a defined, thin spiral curl. You can either leave it as is for a piece-y look, or run your fingers through it to separate the strands and give it more volume.
Flat and Twist Wrap Combo
Now that you know how to do the flat and twist wrap, you can play with combining the two for some beautiful, sexy hair. You can get a glamorous, Hollywood red carpet wave or the flowy, voluminous Victoria’s Secret Angels look:
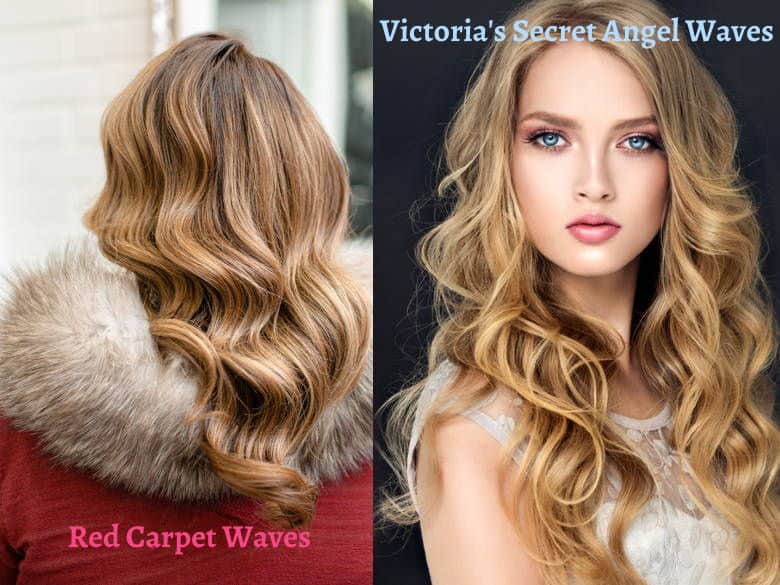
The basic idea is to start with a flat wrap at the top. Then, as you drape your strands around the barrel, start twisting the ends while you wrap so that you end up with a thin rope at the ends.
And always, always curl the hair around your face away from your face. This is especially true for the Victoria’s Secret Angel look.
For the red carpet wave, you’ll want to curl your hair in the same direction on each side of your head. Once you’ve curled all sections of hair, use a large brush to brush through the curls. That will co-mingle all of your curls back together, forming the large, glam uni-wave.
The VS Angel style is more textured and flowy, so you’ll want to finish by finger combing your tresses instead of brushing them through.
Beach Wave
A modern, fun look that a lot of people love is the beach wave. It looks great on everyone, particularly because it creates a lot of volume. If you have flat, thin hair, this is an amazing way to give it more movement and bounce.
The nice thing about it is it’s easy to do, even if you don’t have a lot of experience. Because it’s a more natural, boho look, you don’t have to be super precise. You can use 1”-2” sections of hair at a time depending on whether you have thin, medium, or thick hair.
It’s also easy to do with a conical or tapered wand, which is narrower at the tip of the barrel. This gives you a less uniform, more natural wave that goes from wider to smaller.
With a Curling Iron
- Hold the iron upright and clamp hair near your scalp or towards the middle
- Twist away from your face, particularly on the sections that frame your face
- Leave the last inch or two out and hold for up to 10 seconds for the curl to set
- Unravel as you release, and straighten the ends out once you get to the tips
With a Curling Wand
- Hold the wand with the tip facing down
- Hang onto the ends with your wrapping hand while you wait for the curl to set
- Alternate the curl direction (away from and towards your face) for a more natural, messy, boho wave