Arguably the trendiest style around that’s fun, modern, and looks good on anyone is the beach wave. They’re easy to create on long, medium, or even shorter hair with either a curling wand or flat iron.
So which is better?
Advantages of a Curling Wand
Curl Versatility
The main advantage of using a curling wand is more curl versatility. You can use different techniques to create a variety of looks, such as the ribbon curl or a tighter spiral curl, depending on whether you flat wrap or twist wrap your hair around the barrel.
Changing curl direction on the same section is easier – i.e., curling away from your face from your roots to mid-length, then wrapping hair towards your face as you get down to the ends.
It’s also easier to get a more piece-y, textured wave with a wand if that’s the look you’re going for.
Lastly, conical or tapered wands create natural-looking curls that go from wider up top to tighter near the bottom. Cylindrical wands produce a uniformly even curl from top to bottom.
Less Heat Damage
While all heat styling tools have the potential to damage hair, a curling wand exposes your strands to less direct heat than a flat iron straightener. Your locks aren’t sandwiched between 2 hot plates, which is better for fine or damaged hair.
Fine, wispy hair doesn’t usually need more than a few seconds to curl, so for those of you with delicate, thinner strands, a wand is your friend.
Cheaper Than A Flat Iron
On the whole, you can get a decent curling wand for less than you’d pay for an equivalent-quality flat iron. There are many models out there for $20 or so, while a mid-range flat iron will usually cost you at least $40.
My Favorite Curling Wand for Beach Waves: INFINITIPRO BY CONAIR Rainbow Titanium Curling Wand

- Rainbow Titanium Barrel
- 20 Heat Settings
- Max Temperature 400°F
- 30-second Heat Up
Disadvantages of a Curling Wand
Straighten Separately Before Curling
If you need to straighten your strands before curling, you’ll have to do that with a blow dryer or flat iron, which adds an additional step to your styling regimen. This is especially true for those with natural or frizzy hair.
Less Grip
With a curling wand, you have to wrap and hold your locks around the barrel securely with your free hand. Conical wands in particular can be challenging as hair can bunch together and slide down towards the narrow end if the barrel is too smooth.
If you prefer having something to press against, it doesn’t provide as good a grip as using a flat iron does.
Higher Potential to Burn Fingers
With a curling wand, the hot barrel is fully exposed at all times, leaving your fingers vulnerable to burns unless you wear a heat-resistant glove. This may be a non-issue if you’re used to handling a curling wand, but it is something to consider if you’re not used to using a heat styler.
Advantages of a Flat Iron
Dual Use Capability
Clearly, the biggest benefit in using a flat iron to curl hair is its 2-in-1 straightening and curling capacity. You can have smooth, pin straight locks one day and bouncy, voluminous waves the next.
On top of that, a flat iron is great for concurrently smoothing and curling at the same time. If you normally straighten your hair before styling, you can save yourself that extra step by using a flat iron.
With one tool that can both straighten and curl, there’s no need for a separate curling iron.
Easier Handling
This is highly subjective, but if you prefer twirling your iron vs. wrapping your hair around it, you might find it easier to curl your hair with a flat iron. If you have particularly long, thick hair, it’s less tiresome to press, turn, and glide hair through than it is to wrap the entire length around the rod and hold it there for several seconds before releasing.
Straighten Roots and Ends Easily
The modern beach wave normally consists of wavy hair that flows into straight ends, giving you a more casual, boho look. With a flat iron, it’s easy to smooth out both your roots and ends to tame flyaways so you look less like a mad scientist and more of a head-turning beach beauty.
To start, it’s good to “season” your tresses by pressing the first couple of inches of hair between the flat iron plates a couple times before you do the full length glide. This will give you a smooth start to the waves and help you control your hair more easily.
Near your ends, it’s easy to straighten the tips out for a natural-looking finish.
My Favorite Flat Iron for Beach Waves: HSI Professional Ceramic Tourmaline Flat Iron
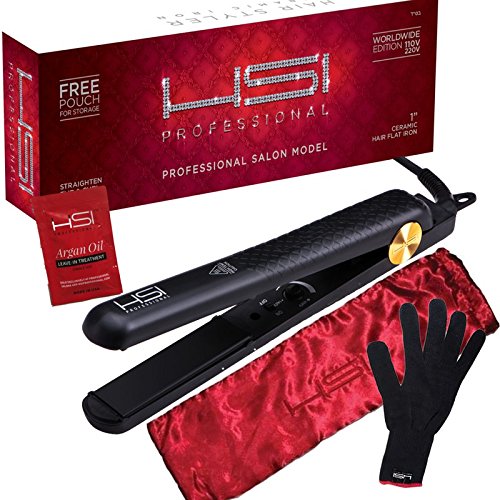
- Tourmaline Ceramic Plates
- Adjustable Heat Settings from 140°F-450°F
- Dual voltage
- Heat-Resistant Glove, Sample Size Argan Oil, Storage Pouch
Disadvantages of a Flat Iron
Less Curl Variety
While a flat iron can do a great job at creating larger curls and waves, you’re mostly limited to one size and shape. Because you’re pressing a section of hair between 2 plates, you’re essentially doing a flat wrap, which produces ribbon-style curls.
Piece-y, textured spirals are not really possible with a flat iron.
Snags, Boxy Curl, and Creases
Depending on the shape of your flat iron shell, you might end up with a square or rectangular curl instead of a round one. You can also end up with a crease or kink in your hair if you don’t have a continuous glide from top to bottom.
Another potential pitfall with a flat iron is snagging or pulling. Angular, fixed plate edges in particular may catch a strand or two while twisting and gliding.
For this reason, it’s best to use a straightener with beveled floating plates and rounded case edges so your hair can glide smoothly between, over, and around the outside of the iron.
Curls Start Further Down
Due to the two sides of a flat iron, you won’t be able to curl near your scalp, which means your waves will start further down the shaft. This is perfectly fine if you don’t need or want them to start near your head.
However, if you want more volume near your crown, a wand is easier to angle closer to your scalp.
How To Create Beach Waves with a Wand
For piece-y, spiral-waves on long hair:
For looser waves with a tapered barrel:
How to Create Beach Waves with a Flat Iron
Basic Steps:
- Use 1” sections at a time (you can also vary the size a bit for less uniformity)
- Clamp hair near the top, then flip the iron over and away from your face so the other side is now in front
- Pull the straightener down to your ends with your hair wrapped around one side of the flat iron (be careful not to press the sides together too hard or you won’t be able to glide hair through)
Bottom Line
Indeed, you can get Instagram-worthy beach waves with either a curling wand or flat iron.
If you have fine, pin-straight hair, a curling wand might be all you need. Since wands are usually cheaper than flat irons, you can save yourself a few bucks in the process.
Otherwise, if you already own a flat iron, try using it to curl your hair. It will take a bit of experimentation and practice, but once you get the hang of it, it’s easy to create that summery beachy look with just a twist and a glide.
What’s your favorite tool for creating beach waves?